
How to Upscale a Video Online with GoEnhance AI?
- What Does Video Upscaling Do?
- Choose an Output Resolution Before You Start
- How to Upscale a Video With GoEnhance AI
- How to Check Whether an Upscaled Video Looks Better
- Common Video Upscaling Problems and Fixes
- Frequently Asked Questions
- Related GoEnhance Tools
If you want to upscale a video, upload the original clip to GoEnhance AI Video Upscaler, select an output resolution, and generate a new version. Then compare the result with the source before downloading. GoEnhance’s upscaler offers output options from HD through 4K, depending on the workflow and settings shown in the app.
Upscaling increases the number of pixels in a video and uses AI to estimate detail between them. It can make a low-resolution or soft clip look cleaner on a larger screen, but it cannot guarantee recovery of detail that was never recorded. For grain, motion blur, or uneven color, use a tool aimed at that specific issue instead of raising resolution alone.
What Does Video Upscaling Do?
A video upscaler converts a clip to a higher pixel resolution. For example, you might take a 720p video and create a 1080p copy, or prepare a 1080p clip for a 4K display.
GoEnhance’s Video Upscaler lets you upload a video, choose an output resolution, and process it in the browser. Its feature page lists 720p, 1080p, 2K, and 4K output options. The exact choices available can depend on the selected model or current workflow.
Upscaling may help with:
- Low-resolution footage: Create a larger output for a monitor, TV, or platform that calls for a higher resolution.
- Soft edges: Improve the apparent definition of objects, faces, and text.
- Compression artifacts: Reduce some blockiness or rough edges in footage that has been compressed.
- Noise or motion blur: These problems may need a separate enhancement step; increasing resolution by itself does not address every defect.
Choose an Output Resolution Before You Start
Pick a target that suits where the video will be watched. A larger number is not automatically better: higher output can take more processing and may make existing flaws easier to notice.
| Source video | Practical target to try | When it may make sense |
|---|---|---|
| SD or 480p | 720p or 1080p | Sharing an older clip on a modern screen |
| 720p | 1080p | Posting to a platform or viewing on a laptop or TV |
| 1080p | 2K or 4K | Preparing a larger master for a 4K display or later editing |
| Already 4K | Keep 4K | Upscaling is unlikely to help unless the clip also has a quality issue |
These are starting points, not guarantees. If the source is heavily blurred, out of focus, or very compressed, test a short section and inspect it before processing the full clip.
How to Upscale a Video With GoEnhance AI
You’ll need the original video file and a browser. GoEnhance’s uploader displays the accepted file types and current size limit, so check that label before choosing your clip. Avoid repeatedly exporting and recompressing the source; each extra compression can discard detail.
1. Open GoEnhance Video Upscaler
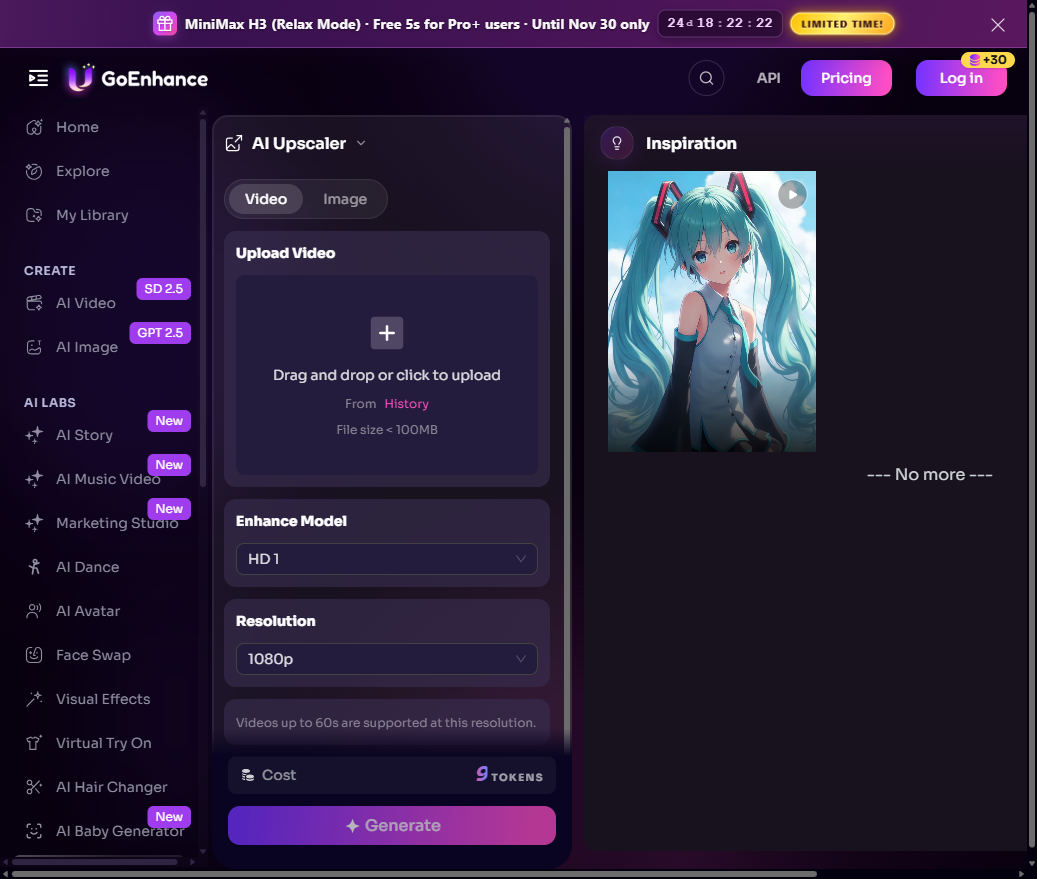
Go to the GoEnhance Video Upscaler app. The Video workspace shows an upload area and controls for Enhance Model and Resolution.
2. Upload the original clip
Select the upload area and choose the video you want to upscale. Use the best-quality original you have, rather than a copy downloaded from a social platform if the original is still available.
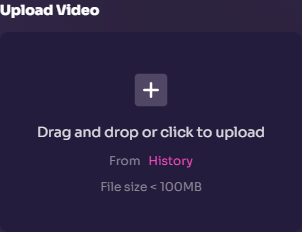
If the upload does not start, check the format and size shown under the upload box. If the clip is too large, make a copy and shorten it in an editor, or export a shorter segment at a high quality setting.
3. Choose an enhancement model
Open Enhance Model and select the model available for your task. The screenshot shows the current HD1 selection. If the app offers more than one model, test a short clip first and compare faces, fine textures, and moving edges before processing the full video.
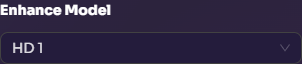
Use the model choice to guide how the footage is reconstructed. A stronger or more detailed treatment may look good on some footage and too artificial on other footage, so judge it against your source rather than assuming one option is best for every clip.
4. Set the output resolution
Open Resolution and choose the target available in the app. For example, if the source is 720p and you plan to share it on a Full HD screen, try 1080p first. If you need a larger master, compare a higher option such as 2K or 4K when it is available.
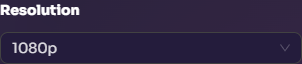
Keep the original aspect ratio in mind. Choosing a higher resolution changes the pixel dimensions; it should not be treated as a way to fix a badly framed or cropped shot.
5. Generate the upscaled video
Review the selected model and resolution, then click Generate. Wait for processing to finish. GoEnhance’s feature page describes a preview and export workflow; when the result is ready, use the available preview or comparison controls before downloading.

6. Preview, compare, and download
Compare the processed clip with the original at the same timestamp and playback size. Look at both a still frame and a moving section. If the result looks natural, download it and continue editing or publish it. If it looks over-sharpened or introduces artifacts, try a lower output resolution or a different model.
The short clip below shows the official GoEnhance 4K before-and-after demo. Play it from the beginning and compare the opening and final frames, especially the eyes, hair strands, and clothing edges.
Before-to-after comparison from the GoEnhance Video Upscaler demo.
How to Check Whether an Upscaled Video Looks Better
Use the same frame in the original and processed versions. A quick side-by-side check helps you see whether the video is genuinely easier to watch or simply larger.
- Faces: Check eyes, hair, skin, and facial edges for waxy texture or invented-looking detail.
- Text and fine lines: Read captions, signs, and small patterns. Look for halos around letters or outlines.
- Motion: Watch a moving subject and a camera pan. Look for flicker, doubled edges, or textures that change from frame to frame.
- Noise: Check dark areas and flat backgrounds. Make sure noise has not turned into smudged patches.
- Color and exposure: Compare skin tones, highlights, and shadows to confirm the new version still looks like the original scene.
- Playback: Confirm the file plays smoothly in your editor or on the platform where you plan to use it.
Upscaling alone does not necessarily increase frame rate. GoEnhance’s Video Upscaler FAQ says frame rate stays the same unless its Frame Boost option is enabled. Check the controls available in your current workflow if you also need smoother motion.
Common Video Upscaling Problems and Fixes
The video is still blurry
A higher resolution cannot fully fix missed focus or severe motion blur. Start from the clearest source file available. If the softness is caused by movement, try a deblur or video enhancement workflow and compare the result with the original.
Faces or textures look artificial
Try a different model or a more modest output resolution. Inspect fine details at normal playback size as well as zoomed in; an image that looks crisp when enlarged can look unnatural in motion.
The video looks grainy after upscaling
Noise can become more visible when a clip is enlarged. For low-light grain or compression noise, try GoEnhance AI Video Enhancer, which is designed for enhancement issues such as noise, blur, and color. Preview the result to make sure denoising has not removed useful texture.
Edges flicker or show a halo
This can happen when processing sharp edges, thin lines, or fast movement. Compare another model or resolution, and check several consecutive frames rather than judging a single still.
The output file does not match the destination format
Upscaling changes resolution, but your publishing workflow may also require a specific aspect ratio, frame rate, codec, or file size. Make those final delivery adjustments in your video editor after you have checked the upscaled master.
Frequently Asked Questions
Can I upscale a video to 4K with GoEnhance AI?
GoEnhance’s Video Upscaler page lists 4K (2160p) among its output resolutions. Open the app and choose 4K if that option is available for your selected model and clip.
Can I upscale a 480p video to 1080p?
Yes, you can choose 1080p as the target when the app offers it. The output will have more pixels, but the result still depends on the source. A clear 480p clip may upscale better than a clip that is blurry or highly compressed.
Does upscaling improve video quality?
It can improve apparent sharpness and make a clip suitable for a higher-resolution display. Upscaling does not automatically correct every issue. Grain, motion blur, color, and lighting may need a separate enhancement workflow.
Does video upscaling increase FPS?
Not by itself. GoEnhance’s FAQ says frame rate remains the same unless Frame Boost is enabled. Check the controls in the current app before generating if frame rate matters to your project.
Should I upscale before or after editing?
For a short social clip, upscaling the final cut can save processing time. If you need to crop, stabilize, or make major edits, you may prefer to upscale the source first so you can work with a cleaner master. Preview the result in your editing workflow either way.
What should I do if the upload is rejected?
Check the accepted formats and size limit displayed in the app. If the file is too large, create a shorter high-quality segment and upload that version. Avoid exporting at a very low bitrate just to reduce file size, since that can make the upscale less clean.