Transform existing images into new styles or edit images with AI. Upload a photo, describe your changes, and instantly generate variations with professional-grade quality.
style transformation to change the visual style while keeping the original layout, text-guided object replacement to quickly switch elements like clothing or accessories, and AI object/background removal to eliminate distractions and create cleaner images.
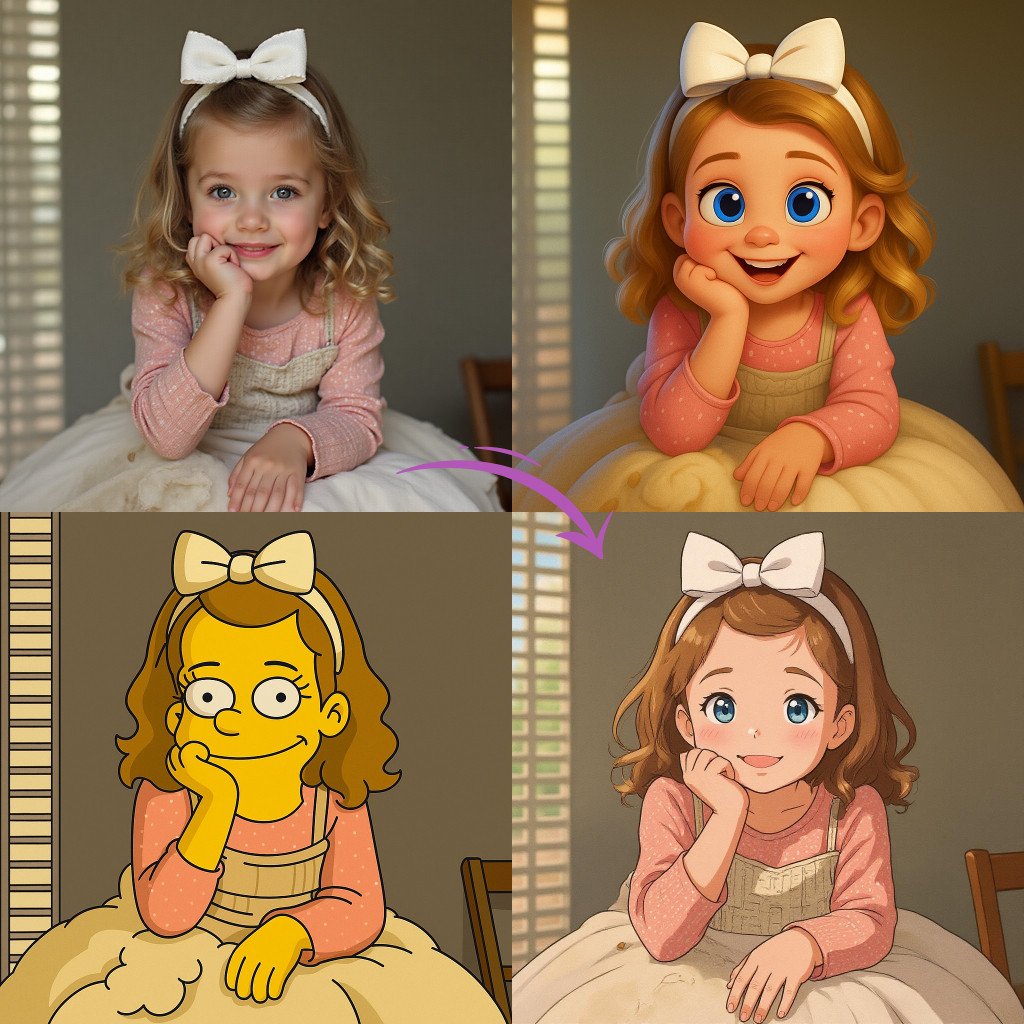
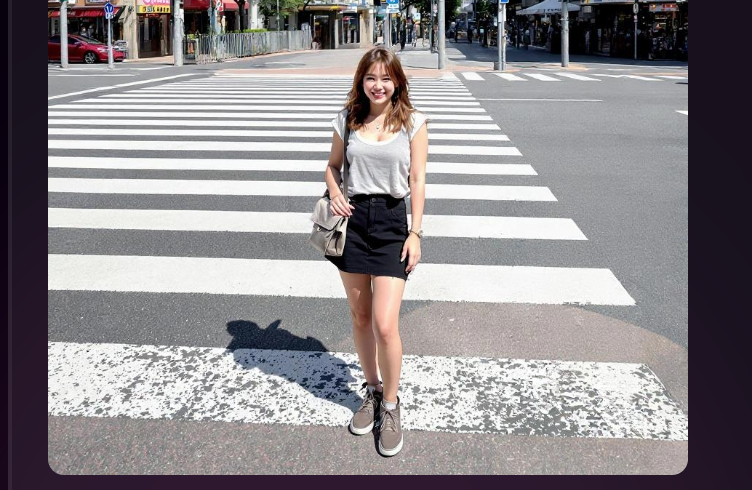
Image to Image Style Transformation
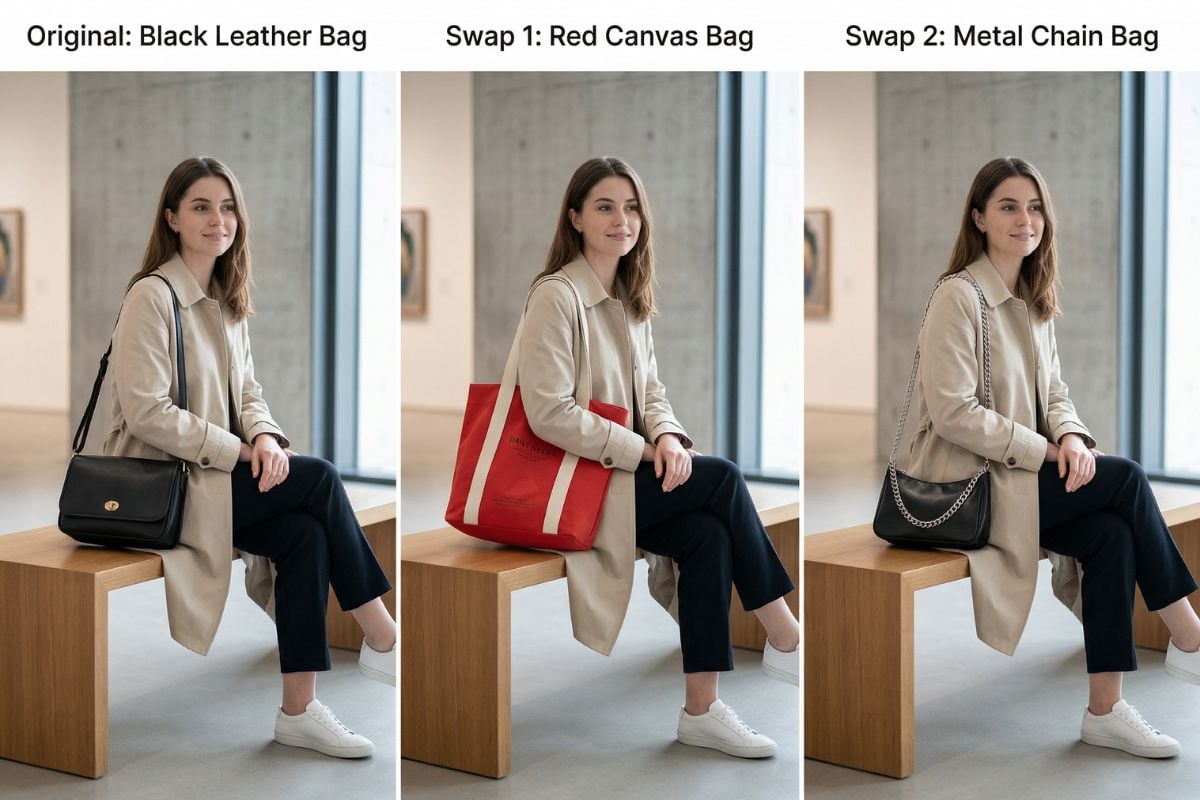
Text-Guided Object Replacement
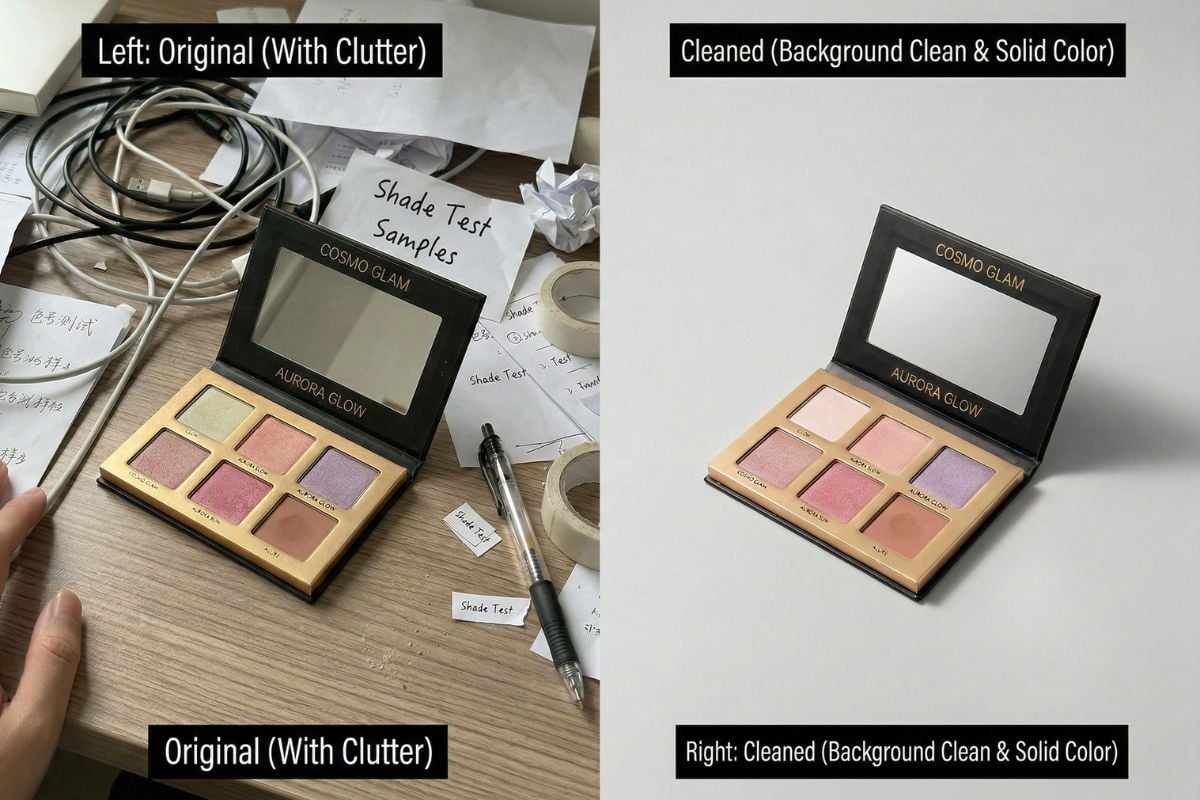
AI Object and Background Removal
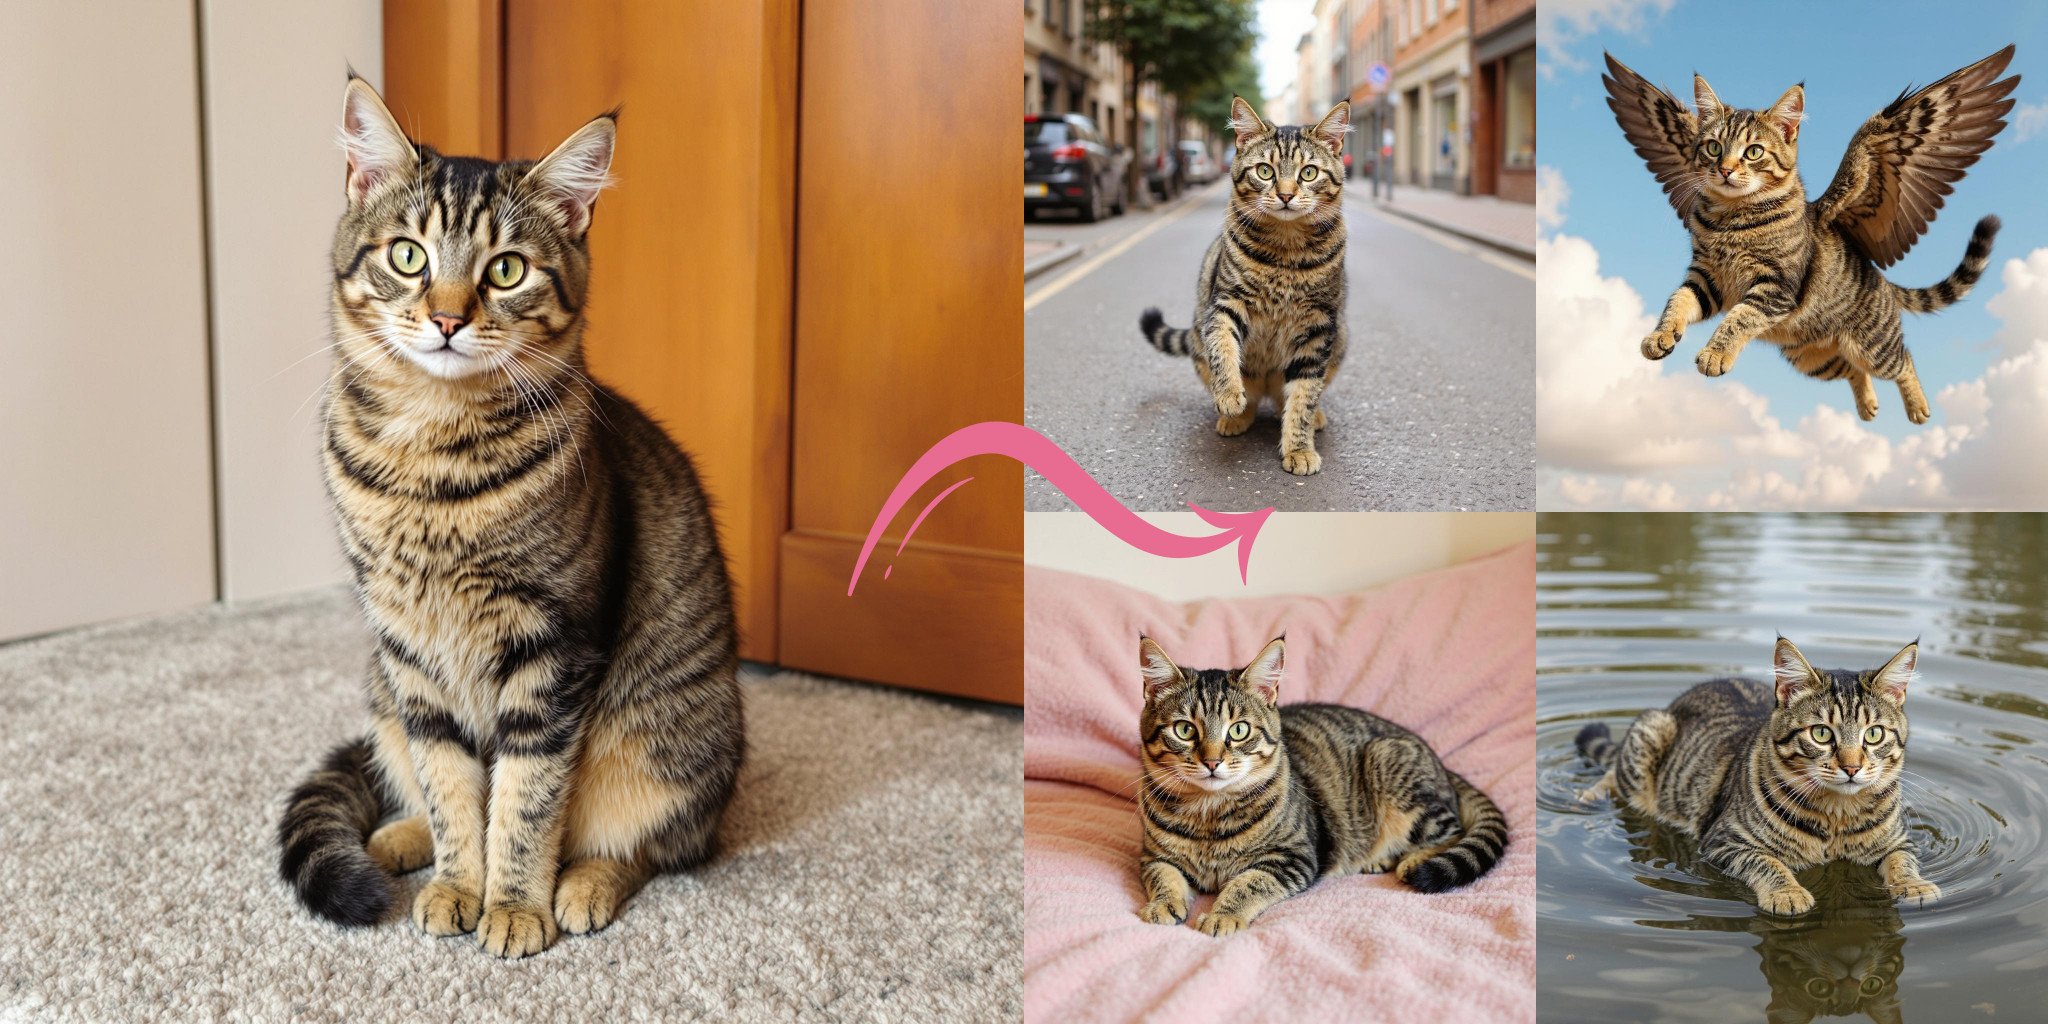
Powerful AI Style Transformations
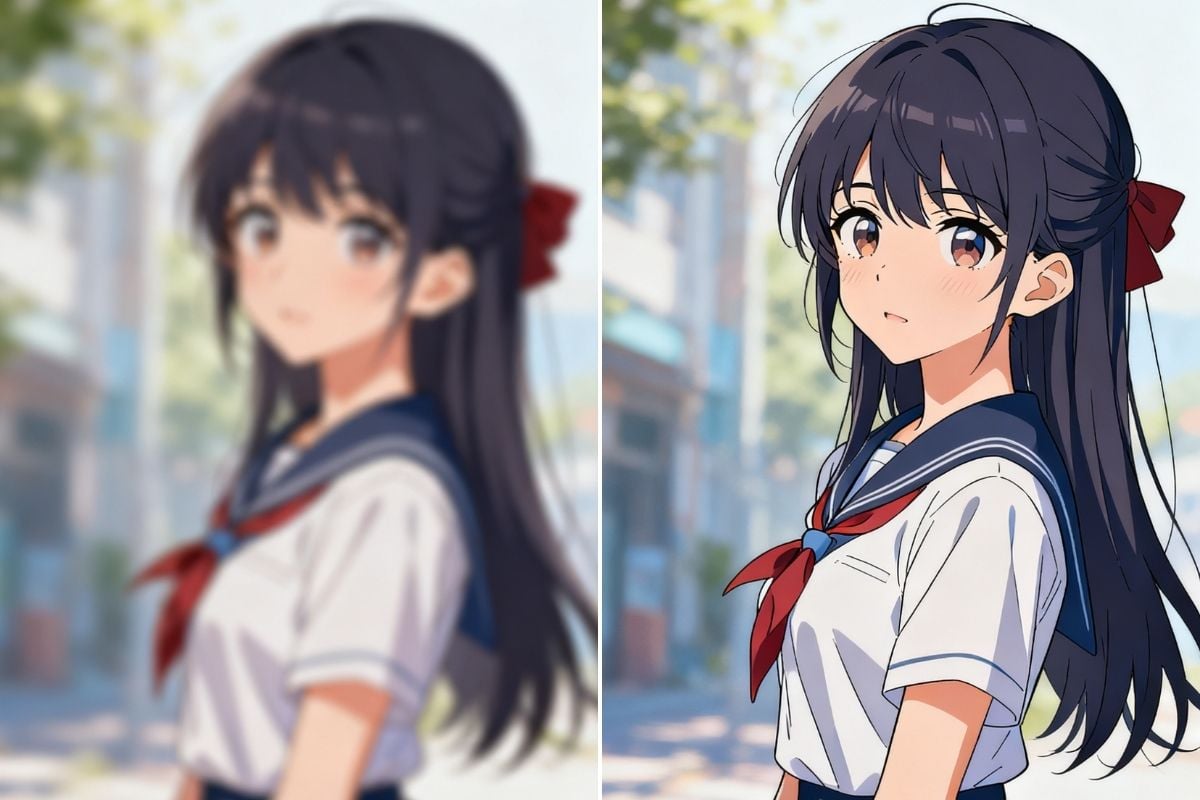
Style Transfer (Anime ↔ Realistic)
Turn selfies into anime or Ghibli style. Or convert anime art into realistic photos — all while preserving identity.
Character Consistency
Maintain the same character identity across multiple generations. Ideal for storytelling, branding, and series content creation.
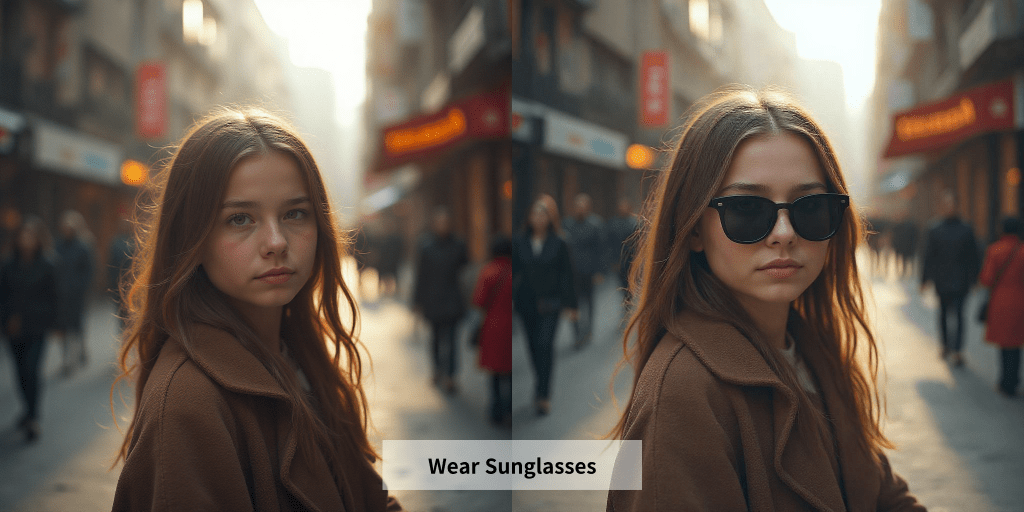
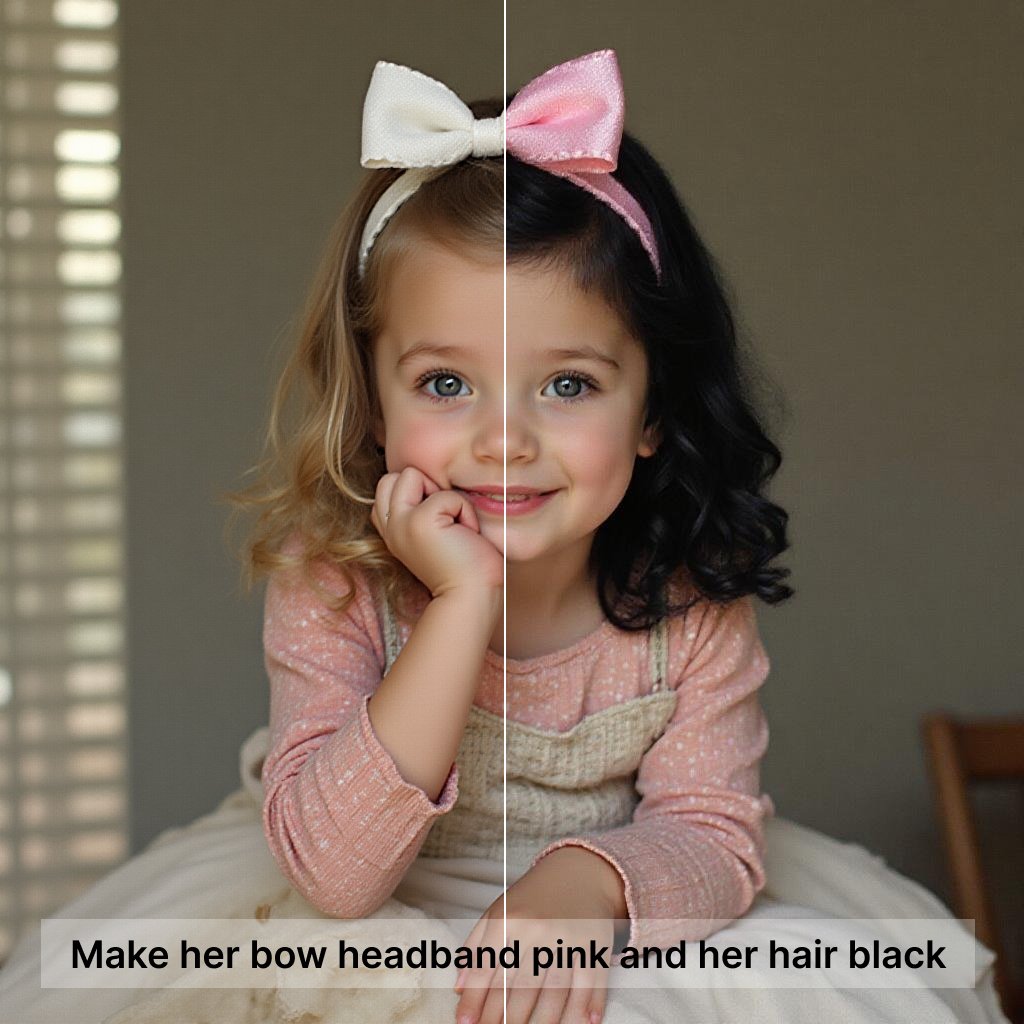
Natural Language Edits
Describe your changes in plain English — like 'remove watermark' or 'add sunglasses' — and let AI make it happen accurately.
Multi-Modal Model Fusion
Powered by Nano Banana 2, Grok Image, and Qwen Image. It brings AI image generator precision to edits by combining visual awareness with language control for cleaner, more accurate results—especially on tricky details and instructions.
Preserve Unedited Regions
Edit only the area you target while keeping the rest of the image untouched. Ideal for small adjustments that match the original lighting, texture, and composition.
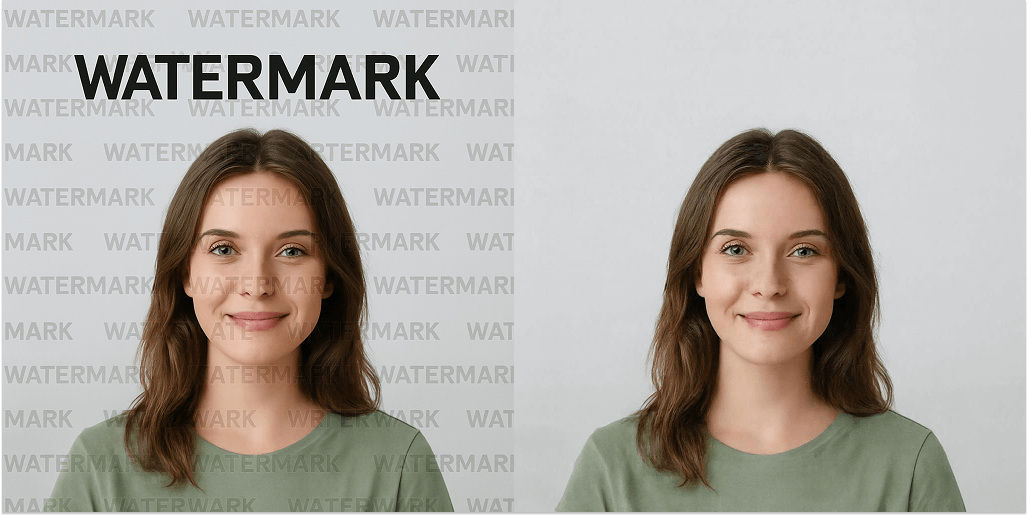
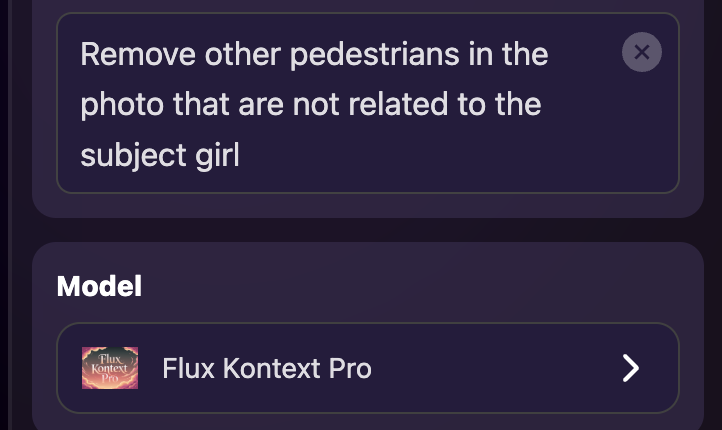
Watermark & Object Removal
Remove watermarks, background strangers, or unwanted objects cleanly—without obvious smudges, halos, or patchy fills, even on complex textures and patterns.
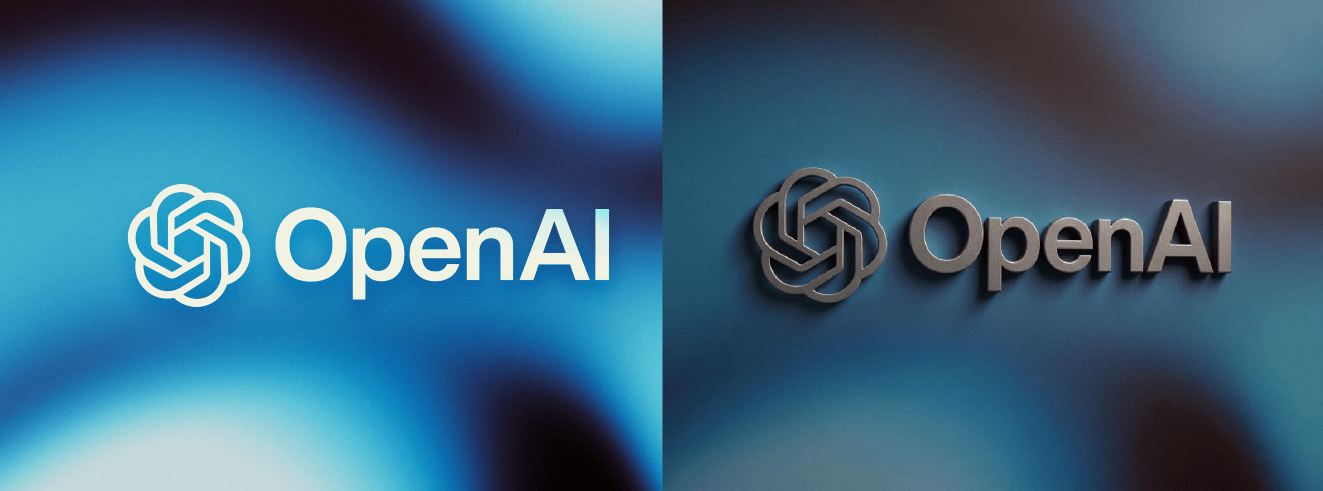
Product Showcase & Logo Rendering
Turn flat logos into photorealistic 3D mockups and polished product shots. Perfect for packaging visuals, hero banners, and e-commerce images with studio-style lighting and props.
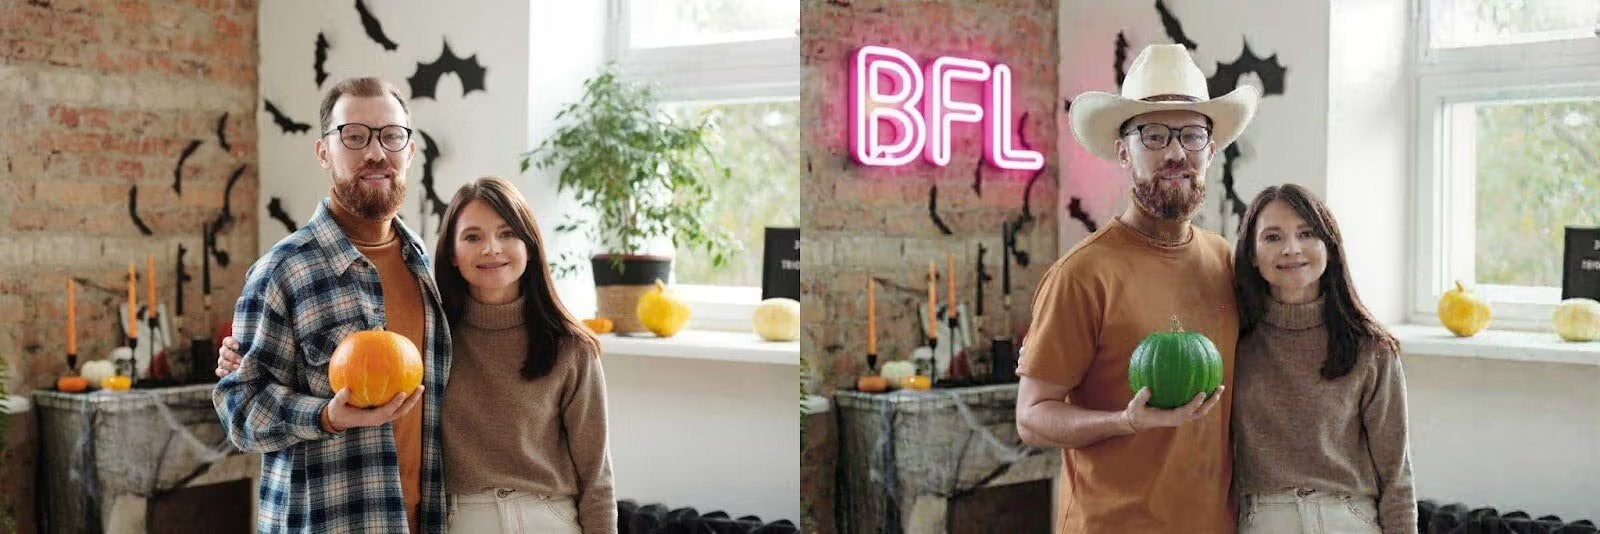
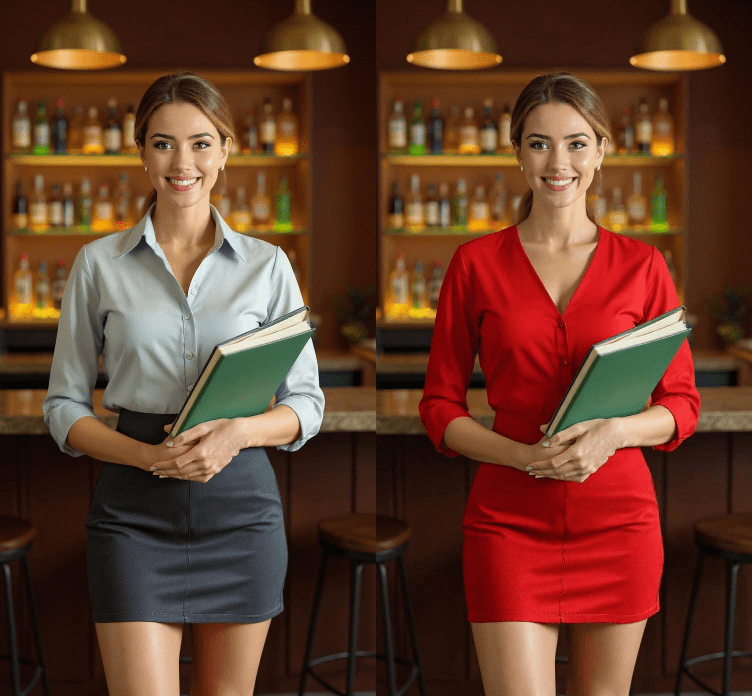
Background & Outfit Swapping
Swap backgrounds or outfits with a single prompt while keeping the subject unchanged. Jump from beach to bar (or any scene) in seconds—no rebuild needed.
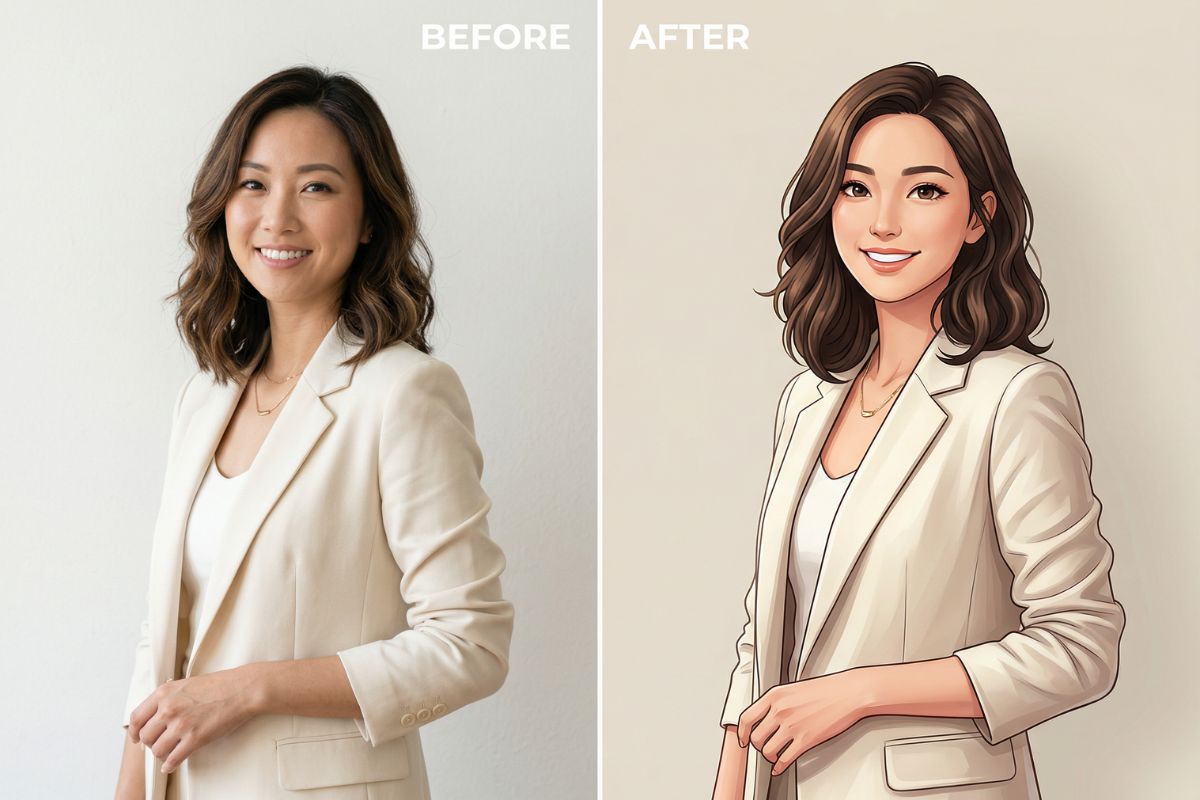
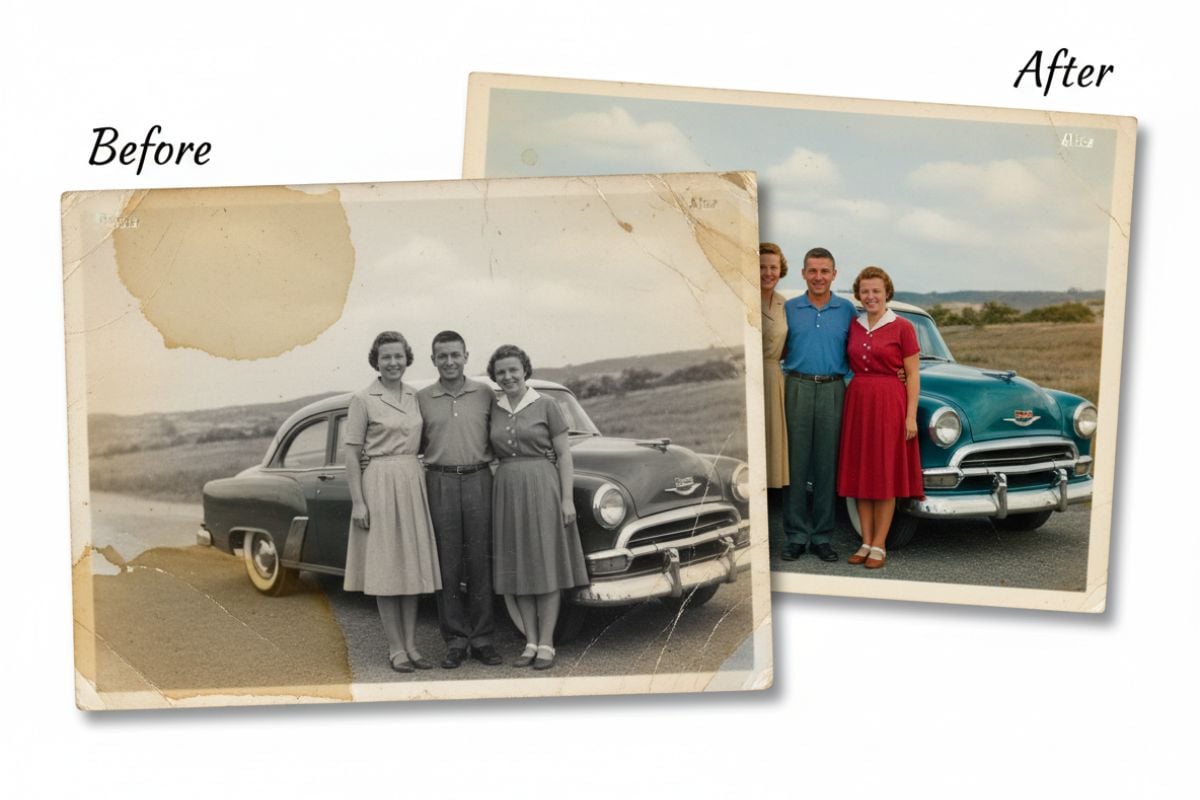
Before-and-After Editing Scenarios
These before-and-after scenarios show how image to image generator can improve an existing visual without rebuilding everything from scratch. Instead of repeating the same basic use cases, this section highlights practical editing situations where controlled changes create a noticeably stronger final image.
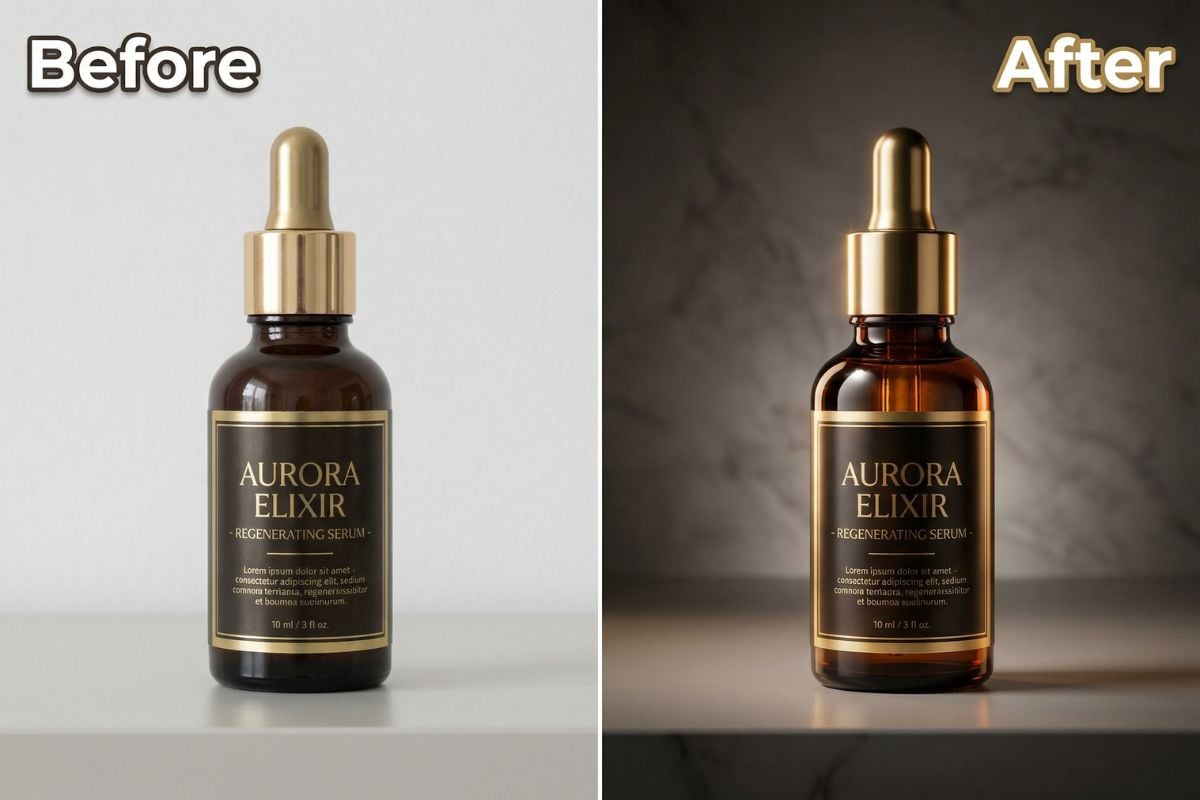
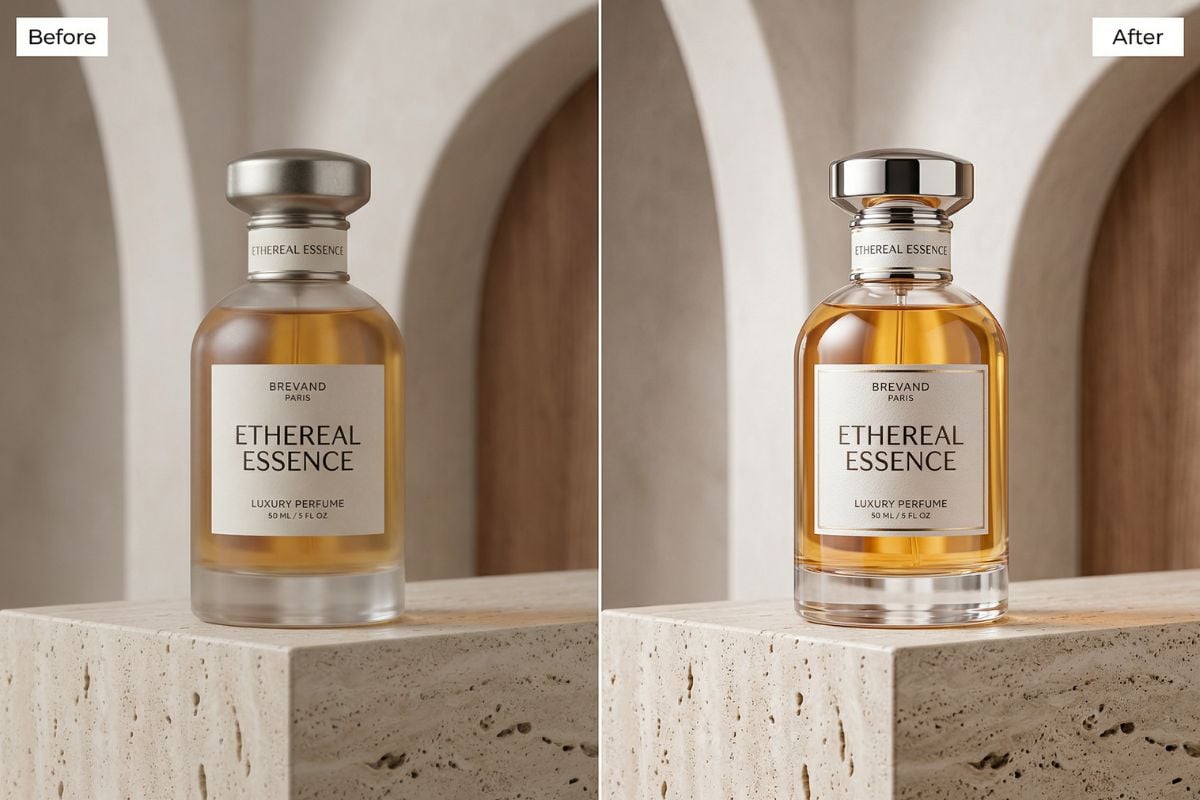
Lighting and Mood Upgrade
A flat or dull image can be turned into something more cinematic by changing the lighting, contrast, atmosphere, and overall mood. This type of before-and-after edit is useful when the original composition already works, but the image needs more impact, depth, or emotional tone.
Material Enhancement
Strong edits often come from improving surface details. Image to image can make fabric feel richer, skin look cleaner, metal appear more polished, or product materials look more premium. The structure stays similar, but the visual quality feels noticeably more refined after the edit.
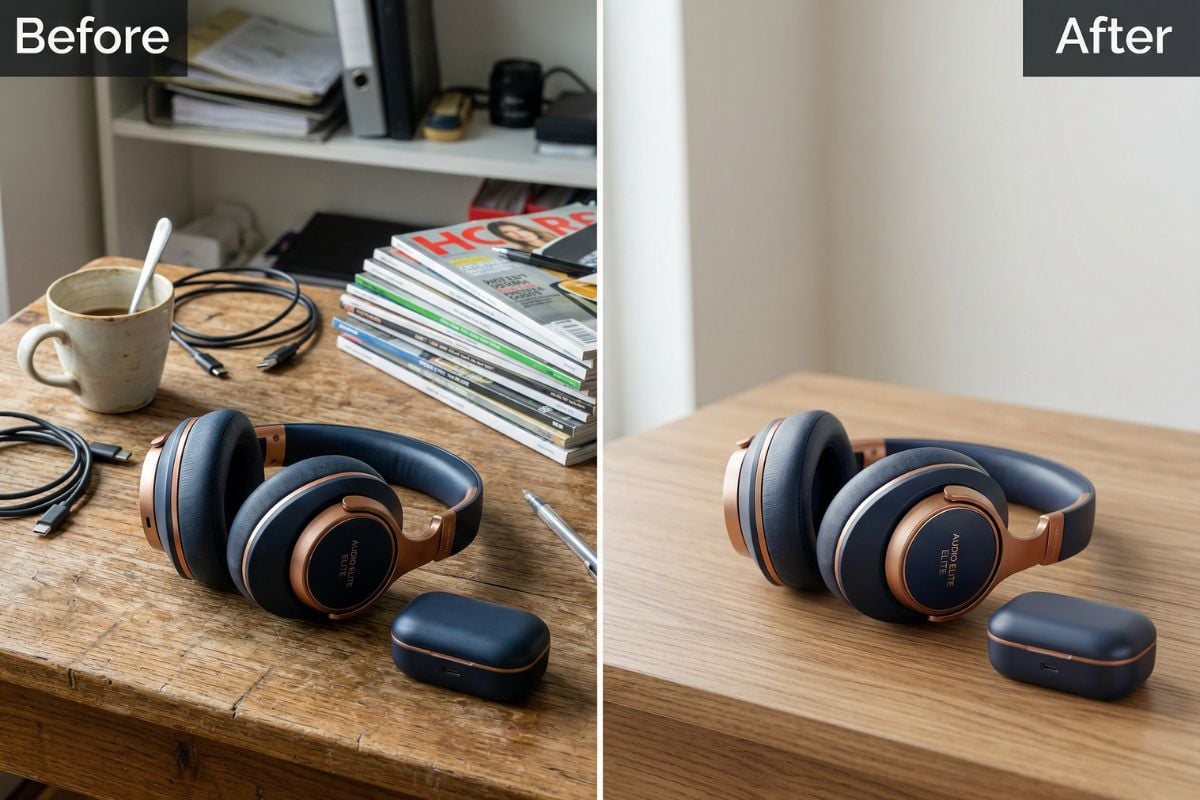
Composition Cleanup
A busy image can become much easier to read when distracting details are reduced and attention is pulled toward the main subject. This kind of before-and-after scenario is especially effective for product shots, portraits, and marketing visuals where clarity and focus matter more than adding dramatic new elements.
Image to Image Prompt Tips That Actually Improve Results
1
Start by Locking What Should Stay
The strongest image to image edits usually begin by defining what should not change. In real use, the most common mistake is describing only the new idea and forgetting to protect the original image structure. It works better to state what must stay consistent first, such as the pose, framing, facial direction, product placement, or overall composition, and then describe the edit.
2
Describe the Edit Like a Targeted Revision
Image to image works best when the prompt reads like a clear revision request, not a full re-creation. The most reliable results usually come from focused instructions such as changing the outfit, replacing the background, adjusting the material, or shifting the style, while leaving the rest intact. Broad prompts often cause unnecessary changes in areas that should have stayed stable.
3
Use Visual Details That Control the Direction
Small visual details often make the biggest difference in image to image editing. Specific notes about texture, lighting, color palette, edge sharpness, mood, or rendering style help guide the result more consistently than generic style words alone. In practice, adding concrete visual cues usually produces cleaner and more predictable outputs.
4
Refine in Passes Instead of Forcing Everything Once
The most consistent workflow is usually a step-by-step one. Large changes and fine detail corrections rarely perform well when packed into a single prompt. It is more effective to make one strong edit first, review what changed, and then run another pass for smaller adjustments. This approach gives better control and reduces the chance of losing useful details from the source image.
Who Is This For?
Marketers
Generate professional product visuals or social media creatives in seconds.
Designers
Speed up your creative workflow with consistent, high-quality variations.
Influencers & Creators
Transform selfies, travel photos, or thumbnails into unique visuals.
E-Commerce Sellers
Create clean product showcase images without the need for 3D rendering or photo studios.
Photographers
Fix lighting, remove distractions, or change style post-shot with ease.
Everyone
Anyone can now do powerful image editing — no design experience needed.
How to Use Image-to-Image AI
Step 1
Upload Your Image
Choose a photo with good resolution and lighting. JPG, PNG, and WebP formats are supported.
Step 2
Describe the Transformation
Enter a text prompt that defines your desired style, color, or composition changes.
Step 3
Generate & Download
Let AI process your request, review the results, and download your favorite versions.
Multi-modal AI Superpowers for Everyone
Why Use GoEnhance for Image Transformation?
Natural Language Edits
Just describe your idea in plain English — no need for precise Photoshop skills. Let AI do the hard work.
Multi-Modal Model Fusion
Our system combines FLUX Kontext Pro/Max, GPT-Image-1, and SDXL to support both image structure and text-based precision edits.
High-Resolution Output
Export up to 4K resolution — perfect for commercial or printing use.
Multi-Image Reference
Support for multi-reference generation — preserve character identity, combine elements, or generate new concepts.
Fast & Free to Start
Enjoy fast generation with no GPU required on your end. Try for free before upgrading.
Versatile Use Cases
Perfect for content creators, e-commerce sellers, marketers, illustrators, and anyone who wants studio-quality visuals.
Everything You Need to Know
FAQs about Image-to-Image AI
What's the difference between text-to-image and image-to-image?
Text-to-image starts from scratch using your prompt. Image-to-image begins with your uploaded image and modifies it based on your prompt.
What image formats are supported?
We support JPG, PNG, and WebP.
How long does image generation take?
Usually just a few seconds, depending on style complexity and batch size.
Can I use the generated images commercially?
Yes. Outputs are royalty-free and suitable for commercial use under our terms.
Can I customize how much the image changes?
Yes. You can control the transformation strength to keep the layout or go for radical changes.
What if I don’t like the results?
You can regenerate with a new prompt or adjust parameters until satisfied.
What types of input images work best?
Clear, well-lit images with good resolution and matching aspect ratio tend to produce the most accurate transformations.
Can I control style transfer versus structure preservation?
Yes. GoEnhance's Image-to-Image AI allows you to adjust ‘strength’ or ‘guidance’—lower settings preserve structure, higher settings apply stronger stylistic changes.
Is there a limit to how many images I can transform?
Limits depend on your plan or tool; free tiers often have daily or monthly quotas, while paid plans offer higher or unlimited usage.
How do I write an effective prompt for image-to-image?
Use clear language—specify subjects, style, lighting, color, and what you don’t want. Include positive and negative prompts for best control.
Will the original subject always stay exactly the same?
Not always. The tool can preserve overall structure, pose, and key visual traits, but exact identity retention depends on source image quality, prompt clarity, and transformation strength. For more stable results, use a clear reference image and avoid making overly aggressive changes in one pass.
Why do some results look inconsistent?
Inconsistent outputs usually come from low-quality inputs, vague prompts, conflicting instructions, or trying to change too many things at once. Better results usually come from clear source images, focused edit requests, and gradual refinements instead of forcing every change in a single generation.
How can I get more reliable results?
Start with a clean, high-resolution image, define what should stay the same, and then describe only what needs to change. In practice, smaller and more controlled edits tend to produce more predictable and usable outputs.
Can this replace manual editing completely?
It can speed up many creative tasks, but it does not replace careful review. For professional work, the strongest results usually come from combining AI-assisted edits with human judgment, especially when checking fine details, text accuracy, product fidelity, or brand-sensitive visuals.
Try GoEnhance Image-to-Image AI
Transform, enhance, edit, and restyle your images effortlessly with AI.